OFF WITH THE ROOF, ON WITH THE ROOF
- Chris Berry
- Oct 9, 2019
- 3 min read
Updated: Feb 13, 2023
With the brickwork now all sorted it was time to get rid of the asbestos roof. To facilitate this (and the installation of the new roof) we scaffolded the south, east and west walls of the building in order to give us a stable platform at just below roof height. The asbestos sheets were then carefully removed by cutting away the metal ‘U bolt’ fixings underneath and then lifting them down the roof and sealing them straight into disposal bags before carefully winching them off the roof. This is a perfectly safe process as long as the asbestos is not disturbed (i.e. broken, cut etc.) and those undertaking it wear full PPE as we did. We then contracted a professional disposal company to remove and dispose of it presenting us with the requisite disposal certificate as required by building control.
Once the asbestos was gone we turned our attention to removing the metal framework it had been sat on. This was made from ‘angle iron’ (well angle steel really) that was entirely bolted together so we sprayed every bolt liberally with penetrating oil and left it for 24 hours (it hadn't been undone since it was installed 50 years ago!). After this we found most bolts could be undone with only those holding the ‘A frame’ horizontals into the pad stones on the brickwork presenting any major resistance. As such we disassembled the rest of the frame and left these three horizontals in place spraying them again liberally with penetrating oil and leaving them another 24 hours. The concern here was that pulling on the bolts too much was moving the wall (it is single skin only) and we worked out that we needed to only pull in the direction of the plane of the wall as this allowed more pressure to be applied but didn’t result in the wall rocking on its footings. Doing this eventually freed all three horizontals and the metal frame was finally gone.
The scaffolding installed and the roof being removed.
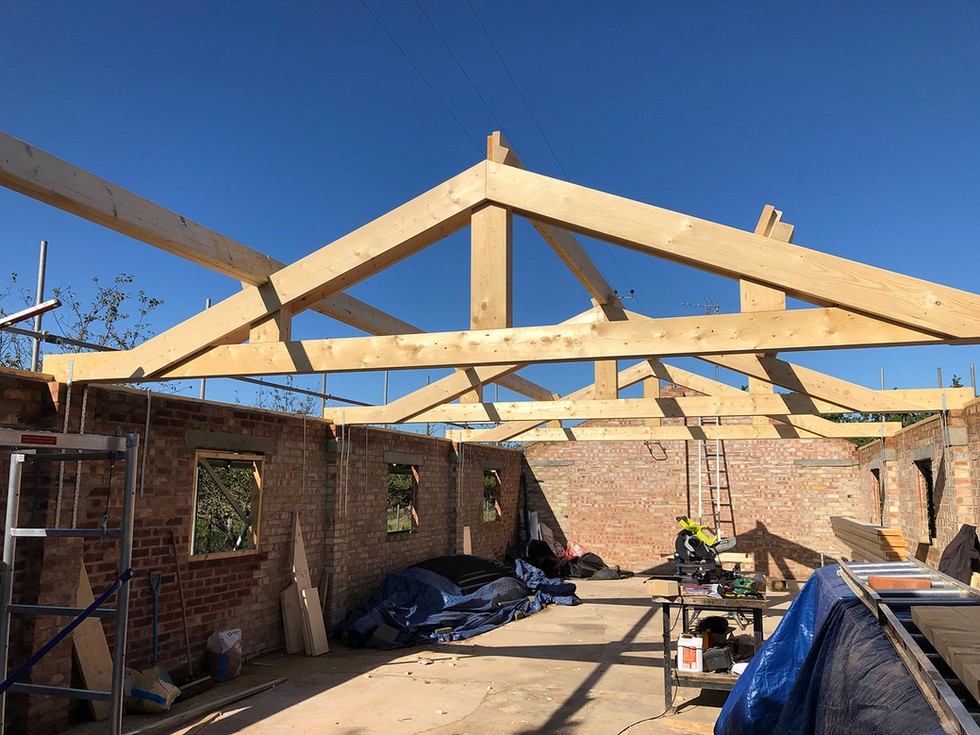
With the old roof now entirely out of the way the old sliding doors were removed and gable wall above them dropped to allow a new lintel to be installed to accommodate the new French doors that were going in that end of the building. The gable was then rebuilt on top of the new lintel. The new roof was to be built traditionally out of timber using 3 ‘A frames’ (situated on the original pillars) and purlins, a ridge beam and rafters. This method of construction was chosen over trusses as we wanted vaulted ceilings in every room in the barn to give it a more airy feel. The structural engineer had detailed the timber specification for the roof and ‘A frames’ but not drawn up any construction details and when consulting this specification (225 x 47 horizontal x 2, 225 x 47 angle timbers x 4 and 100 x 100 verticals x 3) it was immediately obvious that anchoring the ‘A frame’ elements together would be problematic particularly the 100 x 100 verticals to the horizontals as they would butt up making any joint difficult to strengthen. As such I offered a redesign whereby 3 225 x 47 timbers would be used for the horizontals with the middle one cut away to receive the ‘tongues’ of the three verticals (now also made from 3 x 225 x 47 timbers with the middle one longer to create the ‘tongue’). This would give a good amount of timber to secure the angled timbers to (also 225 x 47) at each anchor point by screwing and bolting through. This alternative solution was accepted by building control and we built up the first prototype on the floor before transferring it and two more to the roof itself whereupon they were built up in situ.
New lintel in place, gable wall rebuilt and the ‘A frame’ design and construction... oh and the 'site forecat' taking a nap.
After the ‘A frames’ were completed the purlins and ridge beams (each made of 2 x 225 x 47 timbers screwed together) were installed in 4 sections between the gables and ‘A frames’. These were lined through with a laser level/string lines and suitable packers added to the pillar supports to get them perfectly level and true. Wall plate (100 x 47 timbers) was then added to the top of the wall and secured down with restraint brackets after levelling on a bed of mortar. A number of metal brackets and wooden chocks were added to the construction to add strength and bolster the basic design (I have a penchant for over-engineering everything – a mixed blessing) before the rafters were ready to be installed.
Ridge and purlins being installed.


Comments